
An essential part to my Wizarding World project is, of course, my very own mandrake plant! I love these little creatures. I tried to make a pretty grumpy one, but really there is so much creativity you can show with color, materials, and expression.

To start, gather the materials you will need for the body. I used some straw-like material for the arms and a fake plant sprig for the top. You can be creative for what you use here, as long as it’s artificial so it’ll last and has the look you’re going for. Then plenty of tinfoil for shaping the body.

I started by laying out my materials like a lowercase T, and wrapped the tinfoil around in several layers and squeezed it each time to get it to the shape I wanted while holding tight. (For mine, I decided to put it in a pot so I did not create legs.)
I added details using several materials. First and foremost was hot glue! I also decided to use some foam pieces that I cut out for the brow and mouth. I also used string to add more folds. You can add as much or as little detail as you want but I liked it to look really wrinkled.
To reinforce everything, I used plaster cast strips with water to really hold the arms and top. I cut smaller strips and used them in between the bumps. I wanted it to be really sturdy.
Finally, I used tissue paper Mache to cover everything. Using tissue paper is good because you can really shape it and crinkle it into all the little curves. I only had blue but the color doesn’t matter because you’re about to paint!

Once all the glue and paper mache is completely and totally dry it’s time to paint. I started with a medium brown base coat and covered the whole body. Color choice is yours but I liked warm chocolate browns for mine. I did several coats and they dried completely.
Then I added highlights to the tops of ridges and kind of dry brushed over it to get the details to stand out.
I added lowlights to create more depth and accenting. Going back a bit with some base coat color and highlight color I continued this painting process until it had the exact look I wanted. The main thing you want to highlight is the definition of your lines, folds, and ridges.

I decided to put mine in a pot, so I got an appropriately sized plant pot from the hardware store and to keep the mandrake study I used a toilet paper tube. I cut the end of the toilet paper roll so that it would be easy to glue into the pot.

I stuck the mandrake into the toilet paper base with a little bit of hot glue to secure him, cutting it down so that the pot filler would cover the tube completely. And then glued to the base very securely to the pot.

For the filler I took small stones first and mixed them in a bowl with matte modpodge and filled in the pot with the glue/rock mixture. My goal was to get it to really stay secure. Once that was in I took moss and sprinkled it in the top amongst the stones. This can take a long time to dry but it’s worth it.

Then it dries!

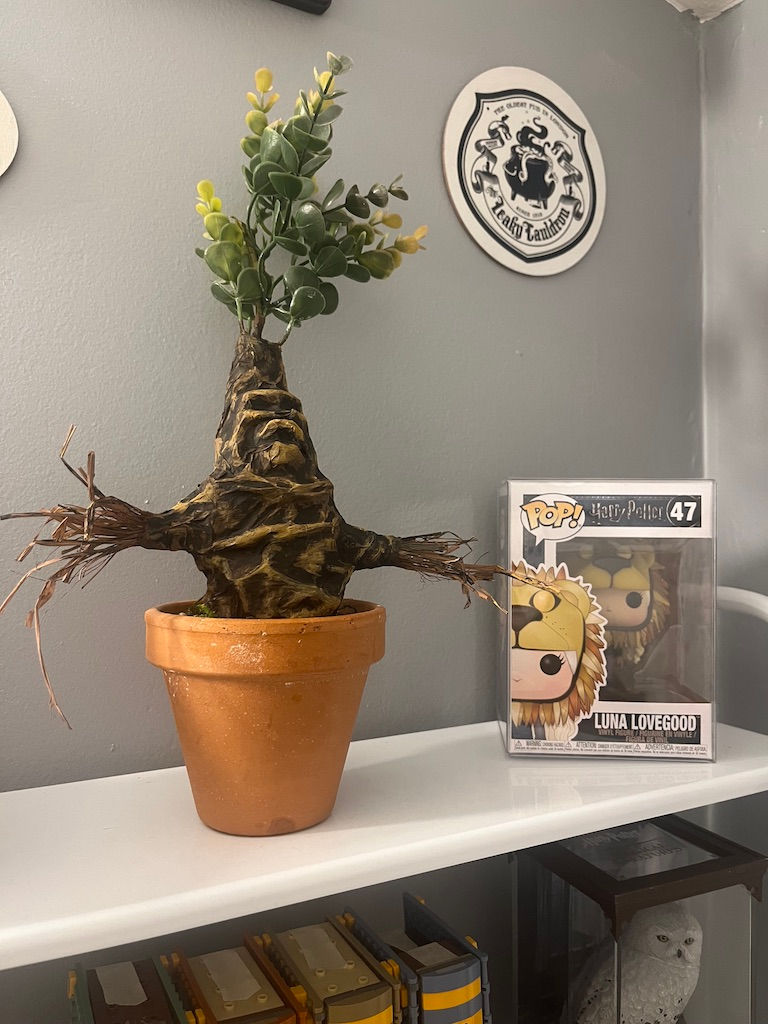
So, now my very own mandrake is finished! (The final step could be to add a label to the pot, I didn’t do this but it’s an option.) I found a perfect spot on the shelf for mine next to Luna and I couldn’t be happier with how it turned out.
Commentaires